Difference between revisions of "HPC:Login"
| Line 20: | Line 20: | ||
There is a known issue that prevents laptops/desktops running Mac OS X Yosemite from being able to download the VPN client from our firewall appliance. The direct link to the client application is [http://o2.genomics.upenn.edu/FortiClientInstaller-Mac.dmg <strong>here</strong>] | There is a known issue that prevents laptops/desktops running Mac OS X Yosemite from being able to download the VPN client from our firewall appliance. The direct link to the client application is [http://o2.genomics.upenn.edu/FortiClientInstaller-Mac.dmg <strong>here</strong>] | ||
| − | ====== Mac OS X El | + | ====== Mac OS X El Capitain ====== |
| − | There is a known issue with Mac OS X El | + | There is a known issue with Mac OS X El Capitain (10.11) that prevents connections to the PMACS HPC cluster after the VPN session has been established. The fix is to use the "internal" IP addresses of the head node, consign.pmacs.upenn.edu, and/or the file transfer node, mercury.pmacs.upenn.edu, '''after setting up the web-based VPN tunnel'''. The internal IP addresses of both these systems are: |
* consign.pmacs.upenn.edu: 172.16.103.23 | * consign.pmacs.upenn.edu: 172.16.103.23 | ||
Revision as of 20:33, 17 December 2015
Contents
Other Pages
Connecting to the PMACS Cluster
Currently, secure shell (SSH) is the only supported method of connecting to the cluster. The login machine name is consign.pmacs.upenn.edu You should probably add "ServerKeepAliveInterval 60" to your SSH client's configuration. After your account is created, you can connect using your PMACS credentials.
VPN for Off-campus access
The PMACS Cluster is behind a firewall. All users authorized to use the PMACS cluster can use this VPN to establish secure connections to the PMACS cluster when trying to SSH from off-campus. This is a web based VPN that can be accessed here. Once a VPN tunnel has been setup, normal SSH connections to the cluster head node: consign.pmacs.upenn.edu can be established.
Note 1 There may be other VPNs managed by PMACS/UPHS. Please ensure that while connecting to the PMACS cluster, you are using this VPN only.
Note 2 The VPN link above may present you with a self-signed certificate ("Untrusted connection") message. It is good practice to always verify that you are connecting to the right server. The SHA1 fingerprint for the certificate is:
38:CF:5F:DC:08:08:CD:74:86:50:A2:C2:B5:78:99:8F:66:51:48:76
Note 3 The web-based VPN is known to work with browsers like Firefox, Internet Explorer (IE) and Safari. There are known issues with using Chrome.
VPN Client for Mac OS X
There is a known issue that prevents laptops/desktops running Mac OS X Yosemite from being able to download the VPN client from our firewall appliance. The direct link to the client application is here
Mac OS X El Capitain
There is a known issue with Mac OS X El Capitain (10.11) that prevents connections to the PMACS HPC cluster after the VPN session has been established. The fix is to use the "internal" IP addresses of the head node, consign.pmacs.upenn.edu, and/or the file transfer node, mercury.pmacs.upenn.edu, after setting up the web-based VPN tunnel. The internal IP addresses of both these systems are:
- consign.pmacs.upenn.edu: 172.16.103.23
- mercury.pmacs.upenn.edu: 172.16.103.24
VPN Client for GNU/Linux
Download client from here
Please also see the section below for more information on how to run the VPN client on GNU/Linux systems.
First Login
Important Host/Server Names
- consign.pmacs.upenn.edu : head node/login server ; Do NOT run jobs on consign
- mercury.pmacs.upenn.edu : file transfer server and the server where home directories are initailized on First Login; Do NOT run jobs on mercury either
- PMACS VPN For Off-Campus Access
- But first see note above about the VPN.
Temporary Password Change
All PMACS accounts are provisioned with a temporary password. Before you can log into the PMACS cluster for the first time, you will need to change this temporary password. Change of the temporary password and enrollment into the PMACS password reset system can be done here
Enrollment into the PMACS Password Reset system
All PMACS account passwords are set to expire every 180 days. To avoid your password from expiring and possibly preventing access to the PMACS cluster, all cluster users are encouraged to enroll into the reset system. The password reset application can be access here. Once enrolled, this system will also allow you to recover forgotten PMACS passwords and reset known/expired PMACS passwords.
Initialize your home area
- With the newly changed password log into the file transfer host: mercury.pmacs.upenn.edu
ssh <your_user_name>@mercury.pmacs.upenn.edu
Remember to replace <your_user_name> above with your PennKey username
- Upon login, you will see a message similar to
Creating home directory for <user_name>
- You are now ready to start using the PMACS HPC cluster :
ssh <your_user_name>@consign.pmacs.upenn.edu
Remember to replace <your_user_name> above with your PennKey username.
Once your home area has been initialized, you are ready to use the PMACS cluster. Do NOT attempt to run jobs on mercury.pmacs.upenn.edu or submit jobs from mercury.pmacs.upenn.edu. Please look at the PMACS HPC Users Guide for information on how to run jobs on the PMACS cluster.
Optional Section: Instructions for generating Public-Private keypairs
For added convenience and security, Public-Private Keys may be used for SSH connections to the PMACS cluster.
On Mac OS X and GNU/Linux systems, run the following command from within a terminal and follow the on-screen instructions. Please DO NOT copy-paste. Read each command and run the command on your own:
$ ssh-keygen
Generating public/private rsa key pair.
Enter file in which to save the key ($HOME/.ssh/id_rsa):
Enter passphrase (empty for no passphrase):
Enter same passphrase again:
Your identification has been saved in $HOME/.ssh/id_rsa.
Your public key has been saved in $HOME/.ssh/id_rsa.pub.
The key fingerprint is:
xx:xx:xx:xx:xx:xx:xx:xx:xx:xx:xx:xx:xx:xx:xx:xx asrini@
The key's randomart image is:
+--[ RSA 2048]----+
|          .      |
|       kjweo     |
|        x B E x  |
|         * B l + |
|        S +aser .|
|           + +   |
|          . weq  |
|           . x 12|
|            45+  |
+-----------------+
On Windows machines you can generate and use PublicKeys with Putty. Here is a link to a Youtube channel which has video tutorials for generating and using Public keys.
After generating a Public-Private keypair, copy the contents of the .ssh/id_rsa.pub file to a file named .ssh/authorized_keys in your home area on the PMACS cluster.
[$USER@consign ~]$ vim .ssh/authorized_keys

One SSH public key per line; save and close the file
Then change the permissions on the file:
[$USER@consign ~]$ chmod 600 .ssh/authorized_keys
More VPN INFO
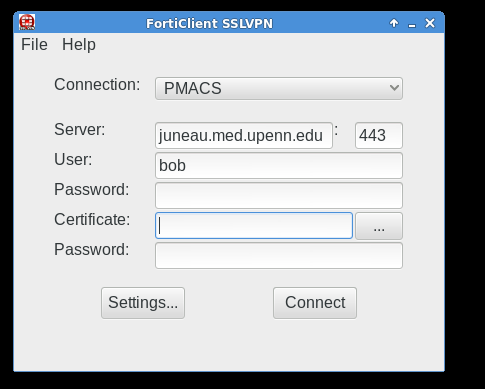
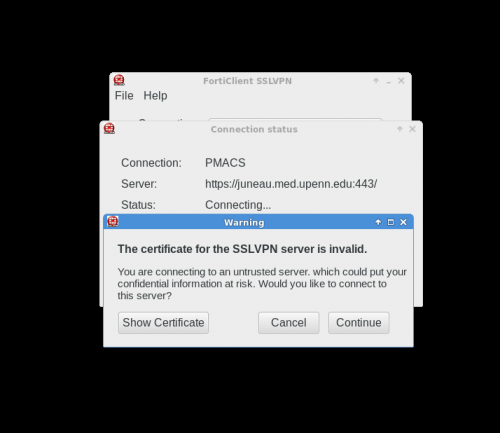
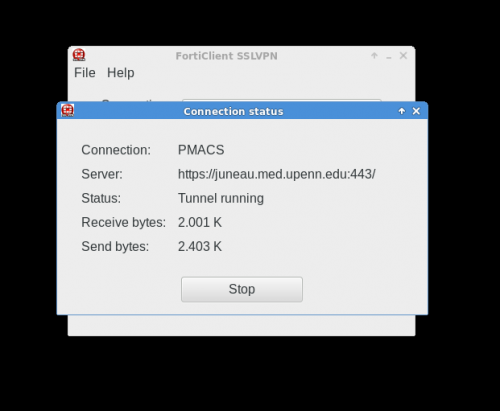
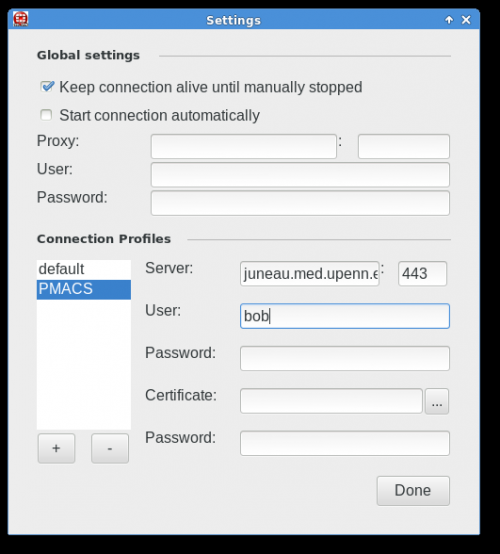
Below are screenshots that describe how to use the PMACS VPN on GNU/Linux systems:


